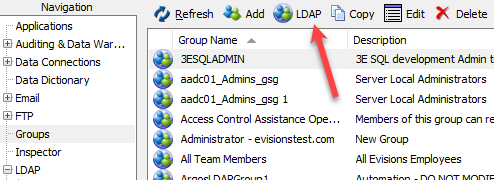
Adding LDAP Groups
To create an LDAP group, click Groups in the Navigation pane then click the LDAP icon. This will launch the Browse for LDAP Groups dialog box shown below that allows LDAP groups to be added.
When MAPS is installed, a group named "Everyone" is created. Any user added to MAPS will automatically become a member of group "Everyone". Since all users are added to this group, use this group with caution.
Before adding an LDAP group you first must set up the LDAP server connection. Instructions on this can be found at Configure the LDAP Server.
Browse for LDAP Groups
Note that the Filter has objectClass=group filled in. This means that when searching the LDAP Server, a list of groups will be returned (as opposed to all entity types on the server).
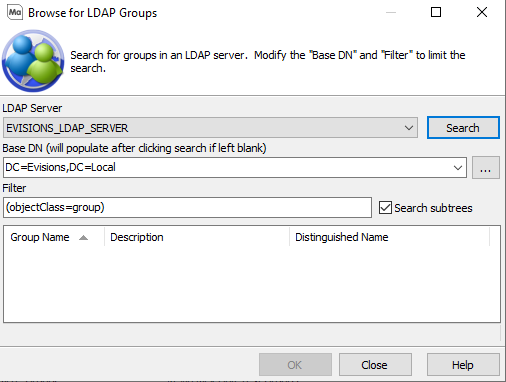
Click the Search button to display all groups on the LDAP Server.
The search results are shown in the figure below. In this example, the Finance group is to be added to MAPS.
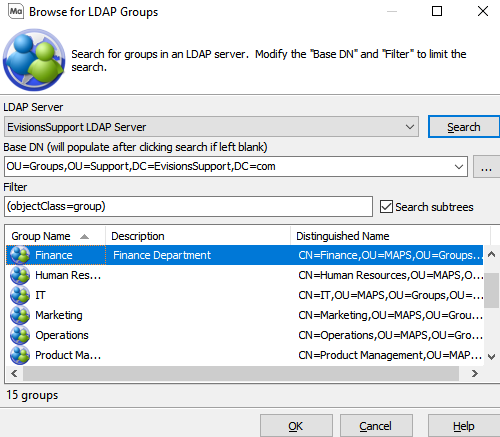
Double-click to add the Finance group – the result is shown in the figure below.

The selected group will be added to the list of MAPS groups with default properties. Note that the icon used to represent LDAP groups is enclosed in a circle, whereas MAPS groups are not.
Double-click to edit the properties of the added group. The Group Properties dialog box shown below will be displayed, where you can edit properties of the group.
Add an LDAP Group - General
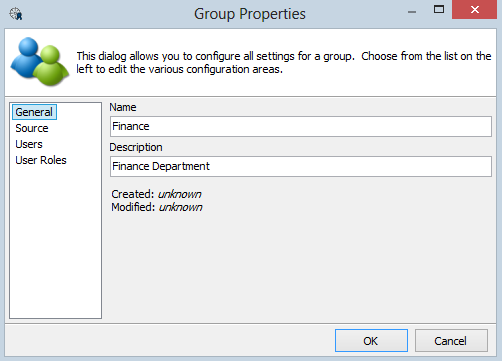
The General screen will be filled in with the name and description obtained from the LDAP server. We recommend this not be changed.
Add an LDAP Group - Source
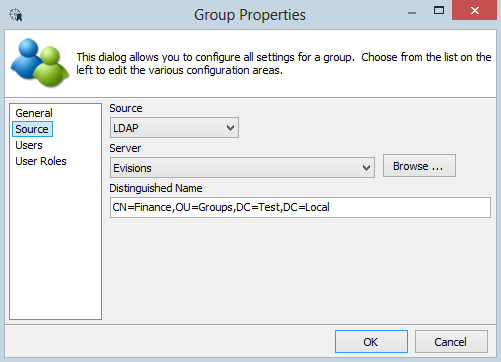
Select Source to continue.
Select the LDAP server that you previously defined on the LDAP screen, then click Browse to locate the LDAP group you wish to add. Browsing for the LDAP group will populate the Distinguished Name field for you, or you can enter it in manually if you know it.
Add an LDAP Group - Users
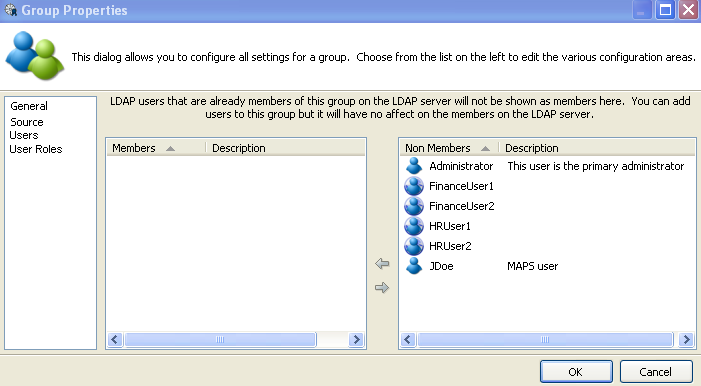
Click on Users to continue. The dialog box above lists the MAPS defined users. You can add these to the LDAP group, if desired. By adding users to a group, you allow any MAPS application to use this group to assign additional security. For example, in Argos you could limit access to a folder by a group.
Adding a user to an LDAP group is not adding them to the LDAP server. Group membership at this point is only being used for assigning security within different MAPS applications such as Argos, IntelleCheck, or FormFusion.
Add an LDAP Group - User Roles
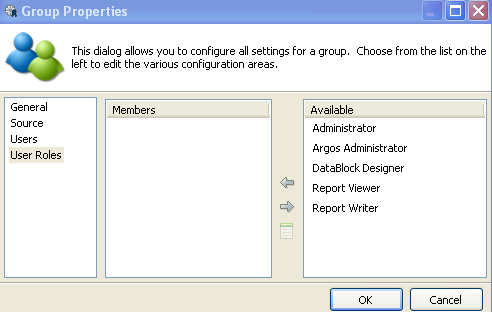
Selecting User Roles allows you to associate the newly added Group to User Roles from the list of available User Roles shown in the figure below. All members of the Group will be associated with the selected User Role(s). Click the arrow key to associate or disassociate the Group to/from a User Role. Clicking the icon immediately beneath the arrows displays the operations the User Role can perform.
Available User Roles can be moved between panes via one of three methods:
- Select an item then click the left or right arrow
- Select an item then double-click
- Select an item then drag and drop into the other Operations pane
It is allowable for a Group to be a member of multiple User Roles. In this case, the set of operations available to the Group will consist of the combined set of Added Operations from each User Role.
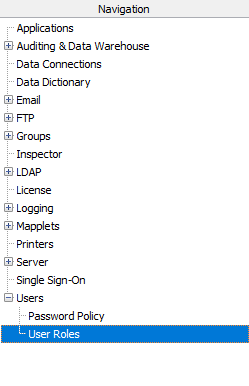
User Roles are created and managed by the User Roles option within the Navigation pane (shown below) and described in the User Roles topic.